This blog post will give you a step-by-step guide on how we stayed on budget with our bathroom renovation, including what materials and costs we used, why certain decisions were made, and more.
This is the final part of our series of bathroom posts. If you haven’t read part 1 and part 2, I highly recommend you check them out before coming back to this post.
In the first post, we went through raw materials that we purchased for our bathroom renovation, including colors, lighting fixtures, flooring and wallpaper. In part 2 , we went over how we framed up our budget for the project.
We even shared what contractor to hire and how much they charge per square foot. This post will go into a bit more detail about each decision, how we came up with that cost, and why it was important to us.
Preparing for the Bathroom Renovation
One of the first things we did when we started looking for companies to do our bathroom project was check out their website. To be honest, a lot of contractors go very minimal with their information and waste your time. Some of them don’t even provide their full name or address.
We looked for websites that gave us confidence in the company and also had a lot of information about what went into their projects. We found that this was something that we could not overlook during our search.
In addition to checking out their website, we also read reviews online about each company. Some sites that we found very helpful were Houzz and Angie’s List. We also made sure to ask friends and family members who had any recommendations for contractors in the area. We looked for a company that was able to give us an accurate estimate of what they would charge, as well as stick to it.
If you are looking for a reliable contractor you can contact: Zibetto Construction Company and ask for Tim! They did an excellent job in our bathroom and we were very happy with the results. Our overall goal for our bathroom project was to try and stay under budget. We ended up doing just that and this post will go into detail about what helped us achieve that goal.
Here’s how we did it:
Bathroom Renovation Details
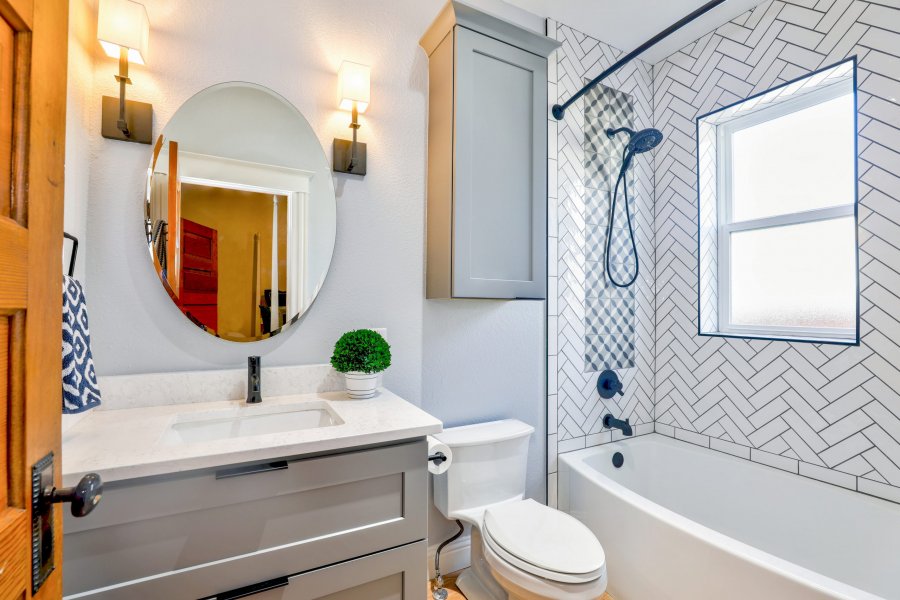
Subway Tile Backsplash Cost – $45.88/sq ft
After doing our research, we decided to go with subway tiles for our backsplash. This was a very affordable option and we were able to get exactly the style of tile we were looking for. We purchased the 12×12 combination mosaic tiles in black and white, which gave us just enough variation in texture and color that we were looking for.
We found that although they were only $2.50/sq ft, they were very easy to cut and work with. This gave us a bit more bang for our buck and was one of the reasons why we decided to go this route.
Countertops Cost – $100/sq ft
We weren’t looking for something extravagant with regards to our countertops. We ended up going with a simple but sleek white laminate countertop that wasn’t too expensive. We looked at quite a few different options, but we decided to go with this because of the cost and its ease of installation.
We ended up getting ours from Home Depot and the overall cost was $70. It doesn’t look bad in person. Our contractor recommended it because it is easy to clean and looks great. However, we are looking into getting something with more style in the future, so we’ll see how we feel about this when that time comes.
Bathroom Cost – $1400
Our bathroom renovation cost us an additional $400. This was mostly due to us having to snatch every penny we could in order to stay under budget. However, we were able to come up with ways to save a bit more money in the end and it really did help us stay within our budget.
Here’s what the project cost us:
Total Bathroom Renovation Cost – $1400
Bathroom Closet Cost – $934.48
Our bathroom closet cost us quite a bit more than our sink vanity did. We had to buy a nicer style closet because of the way our bathroom was configured. We didn’t have a lot of storage options in our bathroom and that is why we decided to go with a nice double closet. This made it an even more difficult feat to stay under budget since we had to buy more stuff for the project.
We used these guys because they were able to give us the exact style closet (and size) we were looking for in order to keep our cost under budget. The double closet cost us $487.48 for the actual frame, $400 for the track and doors, and then we also had to buy all of the hardware from an antique store for another $106.66, so it ended up costing us a total of $934.48.